In this article, Jamie Nelson explains why he has been converted to Uveneer direct composite veneers, and shares his tips to get the best out of this system.
Jamie Nelson BDS is a dental practitioner based in Essex. Jamie has his own practice – G&S Dental – and he is the Clinical Director for Creative Innovations in Cosmetic Dentistry.
I have been restoring smiles with direct composite veneers for around four years, averaging three to four cases a month. However, the game changed when I started using the Uveneer system five months ago.This article will tell the trials and tribulations of using them, and modifying techniques to maximise their effectiveness. I hope you enjoy the journey....

Before Uveneers I’d typically spend around 40-45 minutes a tooth, but with the use of Uveneers I will normally spend 20-30 minutes a tooth (including the polish). The other major advantage to the Uveneer system is the consistency; you will get very reliable results, creating the ideal shapes for each tooth every time. However, I found there are a number of things to watch out for when using them for the first few times.
Persistence is essential; I’m going to now share with you all the secrets and tips I’ve discovered through my learning process. First of all, let’s talk about the process...
Step one - Shade selection
I use HRI enamel plus composite. I’ve tried several different brands and find that this is this best for me, but it’s all down to personal preference; you can achieve great results with any brand of composite. For the shade selection, I place a small button of composite in different shades across the four incisors and then select the colour the patient wants. This way it’s a joint decision and you can ensure you’re giving the patient exactly what they want.
Step two - Prep
When creating a composite veneer, very little to no prep is required. I remove any existing restorations or caries and that’s the only time the bur touches the tooth. I use a sandblaster to clean the enamel surfaces of the teeth, etch with 37% phosphoric acid, prime and bond with Optibond FL.
Step three - Construction
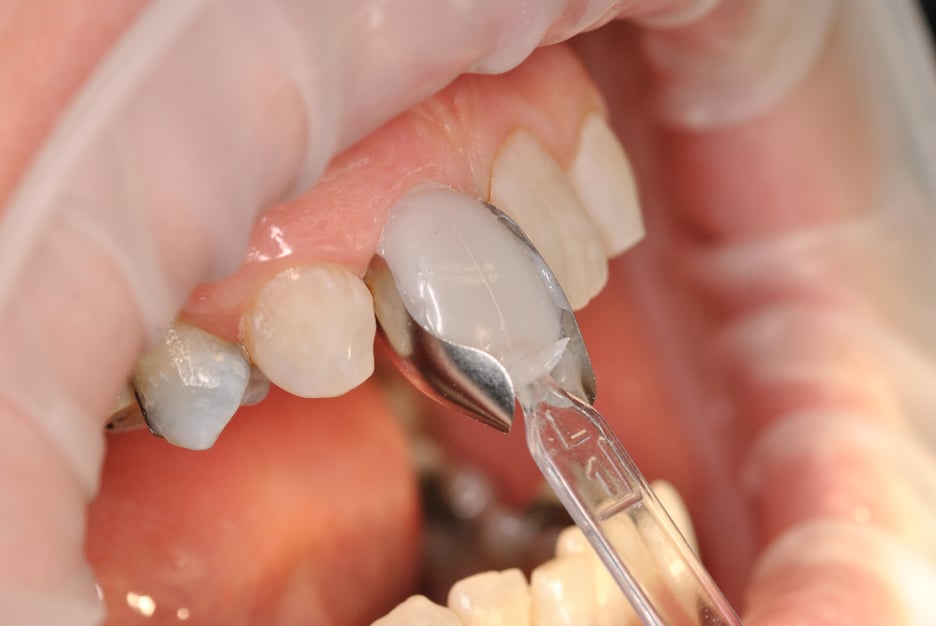
The principle for the Uveneer construction is simple: we have a clear plastic shell that’s shaped for each anterior tooth. The shell is filled with composite and pressed onto the tooth creating a mould in which your new veneer sits. The biggest tip I can give you here is the use of a standard Palodent posterior sectional matrix (kidney shaped). Even before I started using Uveneers, these were an essential piece of kit. They are placed vertically interproximally, and enable you to create interproximal build ups with no ledges, as they are metal they can also be manipulated to help contour your line angles. Their use with the Uveneer system is the first technique modification we’ll discuss, as the official stance is to use a clear mylar strip; however, I found that this encourages composite to slip out from under the strip creating ledges. Using the Palodent matrix the composite is unable to seep out, creating a nice curved un-ledged margin.

With both Palodent matrices in place you can slide the loaded Uveneer into place and apply firm pressure. I will do this with a back of a probe to give an increased tactile feedback. Whilst maintaining firm pressure, remove excess composite from the gingival margin with a sharp flat plastic, or second probe, and the cure for 40 seconds. After removing the Uveneer shell and Palodent matrices, I’ll give a little 20-second top up light cure buccally and palatally, to ensure there are no uncured areas. Always check the palatal aspect before beginning the shaping and add composite where necessary, it’s better to over build at this stage as we’ll be cutting back at the next.
Step four - Shaping
Once you’ve removed your Uveneer and interproximal matrices there is usually a fair amount of excess composite incisally. I remove this with a flat headed diamond bur, and tidy with a coarse Sof-Lex disc (black), until at the ideal height. I’ll use long tapered tungsten carbide burs to remove buccal excess. It’s also important to remember that the Uveneer shape is just a guide – you can cut it back and reshape the surface as you wish. Once I’ve roughly shaped and trimmed all veneers due to be bonded in that session, I’ll adjust the gingival margin, with a short tungsten carbide bur, removing all ledges and ensuring a gentle taper into the veneer. I will do this last as it can cause bleeding, which will affect the bonding of any further composite, so make sure you’ve bonded everything before adjusting the gingival margin.
Step five - Polishing
I really go to town when polishing composite veneers and will typically spend 30-40 minutes on a four-four veneer case. Initially I’ll refine the shapes with Sof-Lex and tungsten carbide burs. At this stage you can put in any surface detail; the trick with surface detail is to make it subtle enough for the patient to never notice it, but for it to be present nonetheless. I’ll use a course rubber cup followed by a fine rubber cup, in both cases ensuring the RPM on the drill is low to medium. If the temperature increases too much the composite will overheat and become matte. After using the rubber cups, I’ll progress onto a silicon infused bristle brush, on medium RPM. I then use a felt wheel with enamel plus Shiny C polishing paste on a medium RPM, and finally finishing with a felt wheel with no paste on a high RPM.
Superior smile design in less time: Case one..
Patient complaints:
• Discoloured central incisor.
• Wishes for teeth to be whiter.
• Uneven chipped edges.
• Rough surfaces on front teeth.
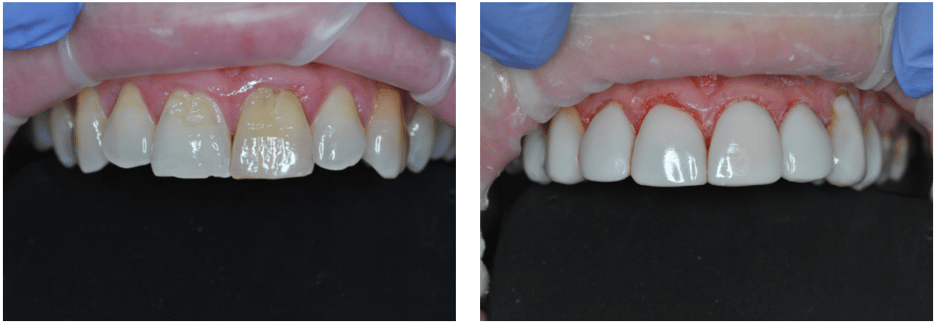
This case is tricky for a couple of reasons. Firstly, the differing colours of the two central incisors, and secondly, the rough buccal surfaces can make it much harder to get a perfect composite to tooth bond strength, due to the potential for air trapping. To combat these two difficulties, we can implement a couple of tricks, one being the introduction of a masking layer, an opaque white HRI UD0 shade was used in this case. Once the masking layer is in place you can proceed with the normal procedure. When dealing with a rough buccal surface, it’s always best to avoid any preparation, but this obviously makes it much harder to achieve the ideal bonding surface. What I do in these instances is heat the composite up to about 60 degrees Celsius to make it more flowable. I’ll then place the heated composite against the defective areas with gentle pressure for around 10 seconds, enabling it to engage the largest area.
Case two..
Patient complaints:
• Wishes for teeth to be whiter.
• Uneven chipped edges.
• Small teeth.
With anterior wear cases, I do three things routinely: firstly build up the canines palatally to absorb the occlusal forces that would
normally be placed on the anterior teeth.
 Case two: Prep – removal of old restorations, sandblasted teeth. Canines built up palatally to create canine guidance and to protect composite veneers – full polish with polishing protocol. Composite: HRI UD1 and UE2. Uveneer size: large.
Bring the veneers as buccally forward as possible, without the patient feeling like the teeth are ‘big’. Thirdly, I give the patient a night guard that needs to be worn for the life of the veneers. I find with these three things in place the direct composite veneer can survive even the biggest bruxer.
Case three..
Patient complaints:
• Wishes for teeth to be whiter.
• Uneven chipped edges.
• Gaps between teeth.
• Narrow teeth near gums.
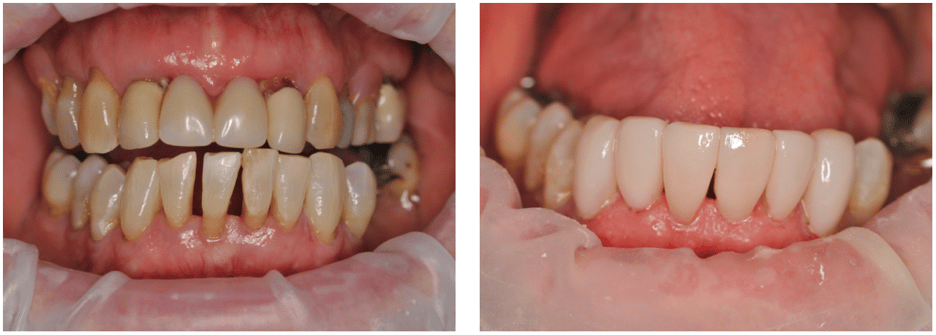 Case three: Pre and postoperative view: composite: HRI UD0.5. Uveneer size: large.
Cases four and five..
 Case four: Small size Uveneer used with composite HRI IW. Fibre post placed in UL2 parapost fibre lux, composite crown built up in UD4 and IW. Case five: Large size Uveneer used with composite HRI UD1 and HRI UE2.
“The simplicity of Uveneer is absolutely remarkable. Why didn’t I think of this?”
-Dr. John C. Comisi, DDS, MAGD
“Terrific tool to quickly and easily create beautiful anterior restorations.”
- Dr. Gary M. Radz, DDS

A new way of working..
Australian-based dentist Dr. Sigal Jacobson (pictured below) created the ingenious Uveneer™ direct composite template kit when she found that traditional freehand direct composite veneers were artistically challenging, time-consuming, unpredictable, and not always cost-effective. Passionate about conservative cosmetic dentistry, Dr. Jacobson knew there was a better, less invasive way to create longlasting, aesthetic composite veneers. She spent years working with engineers to create the perfect design and process for her anterior facial matrix template system. Uveneer was born.
What can Uveneer be used for?
Uveneer templates can be used for any application where the facial side of the tooth needs to be rebuilt including: Direct composite veneers, mock-ups, temporaries while porcelain veneers are being made in the lab, Class V, IV restorations, peg laterals and as a stent for gum contouring.
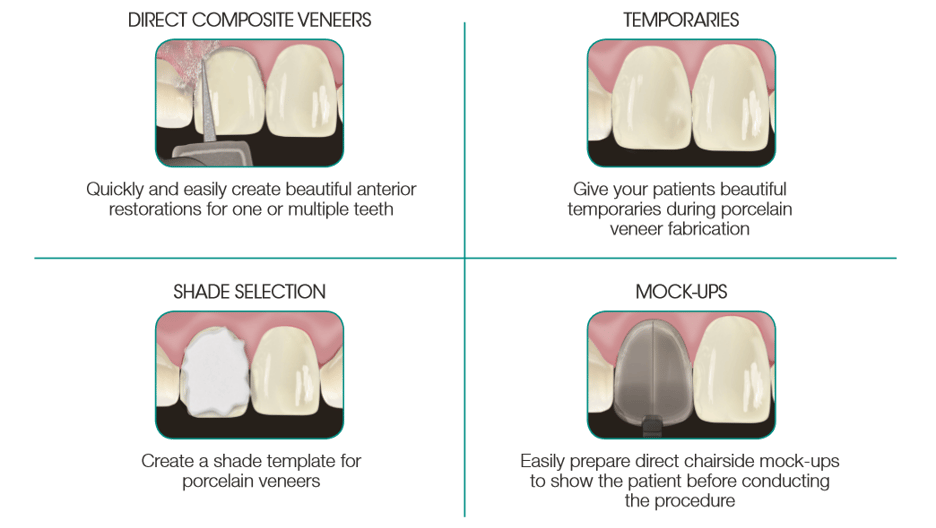
How do Uveneer Direct Composite Veneers make things easier?
It removes the shortcomings of prefabricated systems like thickness, sizing and shade restrictions, cost, and always having to order and wait for stock to arrive. Many dentists who use this system, report that they are performing many more composite veneer procedures than before. They find the process so quick and easy with minimal tooth preparation; use your own composite, layering or cut-back techniques without spending the usual time carving or polishing. It becomes more affordable patients, which lead to higher case acceptance; good news all round.

Each reusable, autoclavable template is designed to mimic ideal tooth anatomy according to the rules of smile design and the “golden proportion” by incorporating ideal height to width ratio, contour, embrasure, and centre midline. Due to the precise anatomical facial tooth contour of the templates, the final result will yield different thicknesses of composite. Because this varied thickness creates different effects and values, only one shade of composite is needed to achieve a natural gradient effect. However, multiple shades of composite can still be used depending on which technique is preferred.
The translucent templates are pressed over composite that has been laid on the tooth after etching and bonding. They allow for curing whilst preventing the oxygen inhibition layer, resulting in a hard, glossy surface that the template can be easy released from. It can be used with any composite, any layering technique and can be used on individual or multiple teeth. It requires minimal adjusting or polishing—saving time and potentially enhancing practice efficiency. Templates are autoclavable and reusable, making it cost effective for both patients and dentists. After preparing just a couple of composite veneers, the kit will have paid for itself.
A popular system for Pediatric Patients
They can be used with children; Pediatric dentists often have to deal with fractured teeth and children don’t have the patience to sit in the dental chair for long procedures. The Uveneer template system is very popular with pediatric dentists as they help to create faster aesthetic restorations.
The system includes a complete set of translucent templates that are made from reusable and autoclavable medical grade plastic with a nonstick coating. The Kit contains 16 x Medium upper and lower arch templates and 16 x Large upper and lower arch templates. Both medium and large templates provide 2 central incisors, 2 lateral incisors, 2 canines, and 2 premolar templates for both the upper and lower arches. Refills are also available.
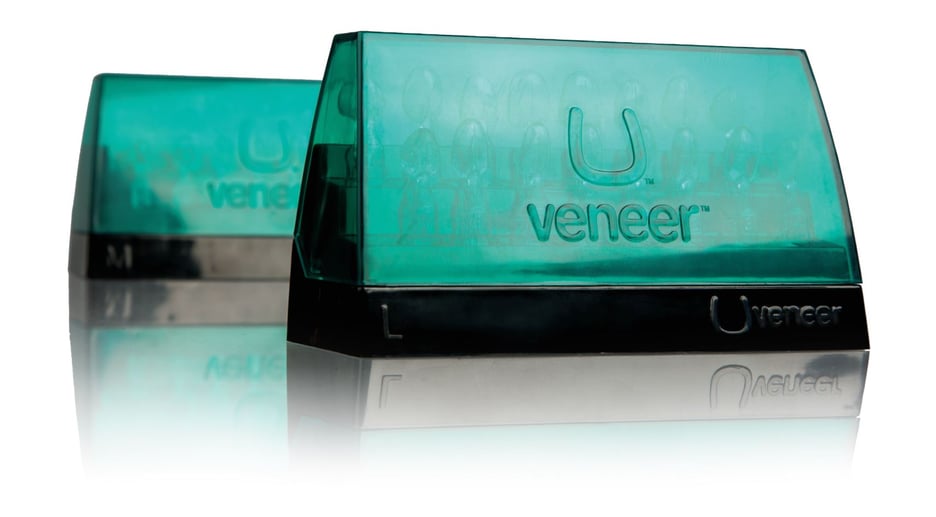
Achieve great aesthetic results with Uveneer
Uveneer templates are easy to use but as with any technique can take a little practice to become proficient. During any procedure, if you aren’t completely satisfied with your initial result, you can simply cut back a small layer of composite with a bur and press the Uveneer template with more composite onto the tooth again. You will quickly learn after one or two trials, how much pressure to use and how much composite to apply to the template. A suggested method for beginners is to do a mock-up on the patient—creating a composite veneer without etching or bonding. Then you can evaluate colour and shape without committing to the result. When starting out, try single-tooth rather than multiple-tooth cases. Once experience and confidence is gained you can then skillfully manage bigger cases.
To arrange a practice visit or for more information call 01943 605050, email sales@optident.co.uk, or visit www.optident.co.uk


