Whenever using dental bleaching with patients, it is important to follow a specific protocol to help give repeatable and predictable smile transformations consistently with every patient.
Dr Anna Salat, honorary member of StyleItaliano has created a 4 step protocol for dental bleaching and tooth whitening. StyleItaliano recommend the use of White Dental Beauty tooth whitening gels which can help whiten teeth in less time.
We say that the first thing to do when a patient arrives at the practice is to take their shade. With your right hand shake hands with the patient, and in your left hand you should be already holding your chosen shade guide: “say hello and take the colour”. It is logical to choose the shade guide according to brightness, as dental whitening increases the luminosity of the teeth.
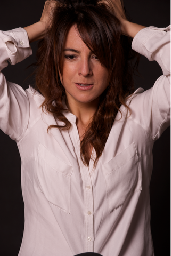
Start with the upper arch for psychological reasons; the patient will appreciate the difference in shade after a few days of treatment which is both encouraging and motivating. Obtain photographic documentation of the initial and final situation with a shade guide; this step has many advantages
1. Say hello and take the colour

Fig 1: One of the effects of teeth dehydration is that it makes the teeth appear whiter than they really are. When using lip retractors take the shade as soon as possible, because dehydration starts from the very first moment we place the lip retractor and dry the saliva with an air-water syringe. “Say hello and take the shade” means that the shade is taken at the very beginning, before dehydration has time to take effect.
Fig 2: It’s easy to become frustrated if you forget to take the shade at the beginning of the appointment because dehydration of the teeth can alter their shade and may lead to errors in shade matching (1). The air replaces the water between the enamel rods, changing the refractive index that makes the enamel appear opaque and white. So the teeth dehydrates and the colour changes. Rehydration takes time, usually more than 2 hours (3)


2. Choose the shade guide depending on luminosity
Fig 3: My favorite shade guide is VITA Bleachedguide 3D-MASTER® . The human eye is very sensitive to slight changes in luminosity that’s why there are specific shade guides available, made only for shade taking in bleaching procedures. These guides have many options, more than regular shade guides made for prosthesis or conservative dentistry, and have very small changes in value or luminosity. Remember that dental bleaching increases luminosity, has a little effect on chromaticity and almost no effect on tonality.
HUE, CHROMA, AND VALUE
Hue is the attribute of colour that allows it to be classified as red, yellow, green, blue, or an intermediate between any combination of these colours. In the Vita shade guide hue is defined as A, B, C, D. Dental bleaching doesn’t affect the hue.
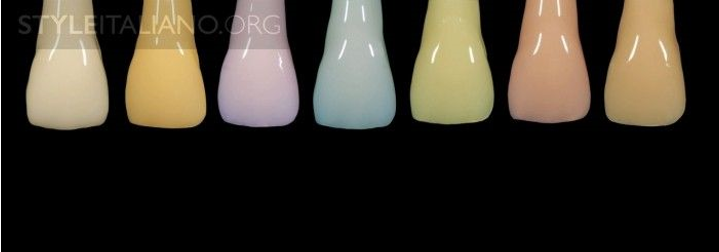
Fig 4: Chroma or saturation describes the intensity of a specific colour. In the Vita Shade Guide chroma is indicated with numbers, with 1 being less chromatic and 4 being more intense. Bleaching slightly affects the chromaticity, and reduces the yellowness. (4)
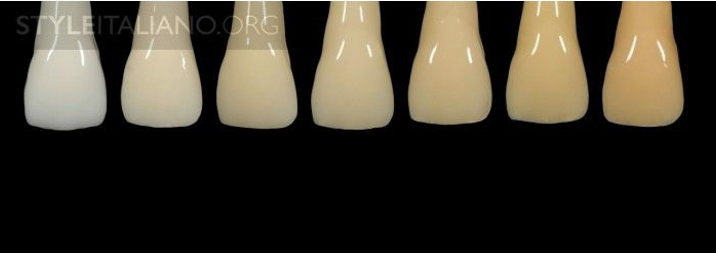
Fig 5: Value is the level of brightness from black to white, and is typically not represented at all in the shade selection process. However, value is the most important component when performing bleaching, as well as in restorative dentistry. Dental bleaching specially affects the value by increasing it, making teeth look brighter.
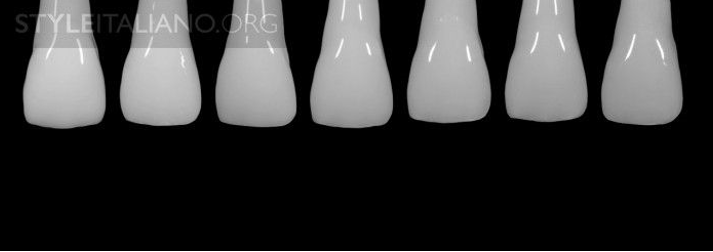
Fig 6: Classical Vita Shade guide classified by hue or tonality.
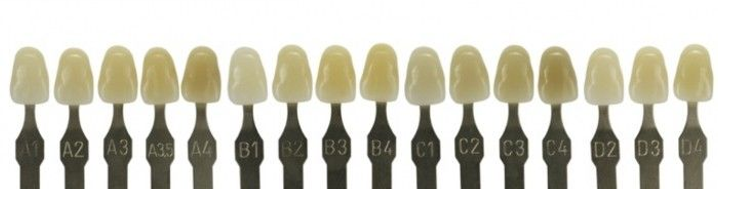
Fig 7: Classical Vita Shade guide classified by value. It is strongly suggested that you classify one of your Classical Vita Shade guides for bleaching purposes. This can also be used for restorative and prosthetic dentistry.
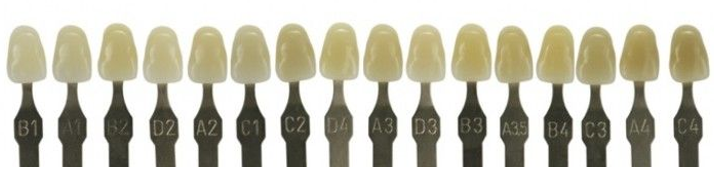
Fig 8: The VITA Bleached guide 3D-MASTER is the best tool for planning and monitoring tooth whitening processes.
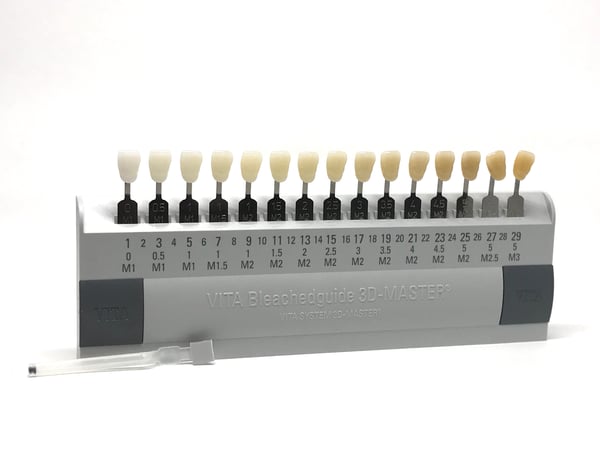
- It determines the level of luminosity during bleaching in only one step
- Its clear organisation supports communication between dentist and patient.
- It provides a realistic representation of the bleaching procedure and simplicity thanks to an easy and comprehensible structure.
In the above picture you can see the Vita 3D-MASTER Bleached guide (5) with tabs based on brightness levels as defined by the American Dental Association; this facilitates an accurate recording of grades in the bleaching process. When it comes to documenting shade changes, the VITA Bleached guide 3D-MASTER is the only linearly-aligned shade guide that has the ability to properly document the changes systematically.
Due to equally-distanced shade tabs, it is easy to perceive colour shifts and accurately depict equal shade shifts between each shade tab. Shade guides are typically not scientifically fabricated to have each of their shade tabs equi-distant in the 3D colour space. Some shade tabs look very similar to their neighboring shade tab, while others look dramatically different. This deviation in colour can create a drastic difference, or a very minor (almost indiscernible) change between shade tabs. This can make the shade analysis and selection process very difficult. (6)
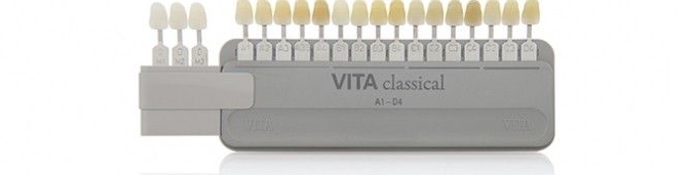
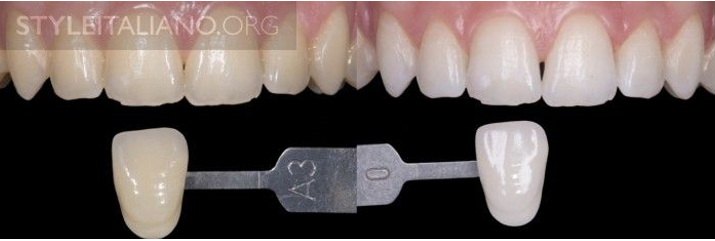
Fig 9: Even when more detailed and precise colour matching and control over the bleaching procedure is required, we advise use of the dedicated VITA Bleached guide 3D-MASTER shades. Three bleached shades are available as a supplement for the VITA Classical guide, for those who would like to stick to that system for dental bleaching. These VITA Bleached Shades include 0M1, 0M2 e 0M3, which are integrated into the VITA SYSTEM 3D-MASTER.
3. Treat the upper arch first
Fig 10: Always bleach the upper arch first during the first week. For tooth whitening it is a fact that, for a patient, it is vital to be able to notice a difference brought about by the treatment; this is only possible by comparing the colour of the teeth before and after treatment. If we take into account the imperfection of human colour memory we should bleach the upper arch first, thus helping the patient to appreciate the difference in colour and encouraging and motivating them to continue with treatment.
This reduces the possibility of patients not remembering their initial shade and concluding that the bleaching isn’t working.
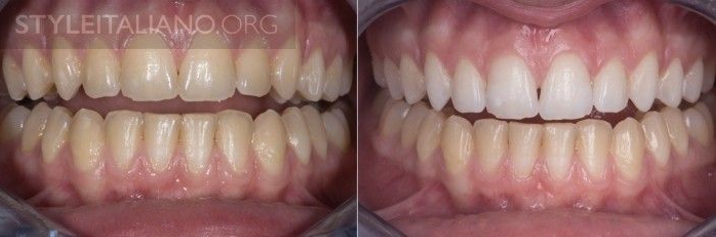
In Fig 10 (case from Dr. Gregory Camaleonte) you can see the difference after one week with bleaching trays and 10% carbamide peroxide (White Dental Beauty, Optident), used only on the upper arch.
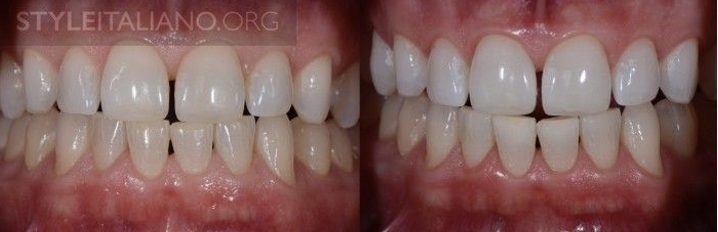
Fig 11: After one week with 6% HP (hydrogen peroxide) (WDB White Dental Beauty, Optident) used only on the upper arch.
4. Use photography to help you
Fig 12: It is not always easy to obtain consistent pictures as there is some difference in the parameters, for example flash position. To evaluate results in bleaching cases we need consistent photographic evidence using both ‘before’ and ‘after’ pictures.
- Use the same camera
- Use the same flash power
- Same flash position
- Same magnification ratio
- Same exposure
- Same ISO Protocol
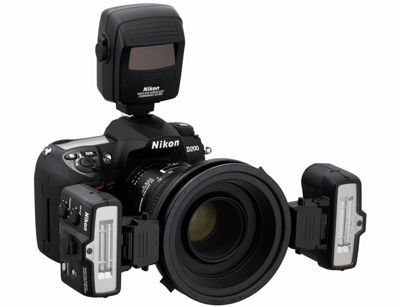
1 – When using DSLR camera to document bleaching, there are some variables to take into account: aperture, focal distance, flash power, ISO, speed, flash position, flash power and exposure. It is advisable to have a precise protocol that is used all the time and that is written down into the patient’s record. For example, I usually use camera brackets with point flashes R1C1 and the position of the flashes can easily vary by some degrees, thereby altering the colour accuracy and making it difficult to evaluate results.
Fig 13: Before and after bleaching pictures.
Images taken with a DSLR camera - Nikon 7200 with Nikkor 105mm micro lens f22 EV+/- 0, 1/125, iso 100, 1.8:1, point flash R1C1 45 degrees, manual flash 1/2 power, shadeguide: Vita Classical+ Bleach colours.
It is important to use the same settings for the initial and the final pictures so as to compare colour.
To take the picture use black Flexipalettes, retractors and the most appropriate sample from the shade guide. With one hand hold the camera and with the other hold the tab. The assistant can show the patient how to hold the retractors and blow air to remove saliva and with the other hand holds the black background as far as possible from the teeth so as to obtain a pure black.
We should always use the same settings with the DSRL:
- The same camera (I use Nikon 7200 with a macro Nikor 105mm)
- Same flash power (with a Nikon point flash R1C1 power 1/2 and full power with a polarized filter)
- Same flash position (45 degrees with my point flashes R1C1)
- Same magnification ratio (1.8:1)
- Same exposition (f22, +/- 0)
- Same ISO (100)
Fig 14: Protocol 2: A simplified protocol using Smile Lite MDP (Mobile Dental Photography): this device allows you to adapt your smartphone to a light system equipped with three groups of LEDs (light emitting diodes). The resultant pictures will dramatically improve.
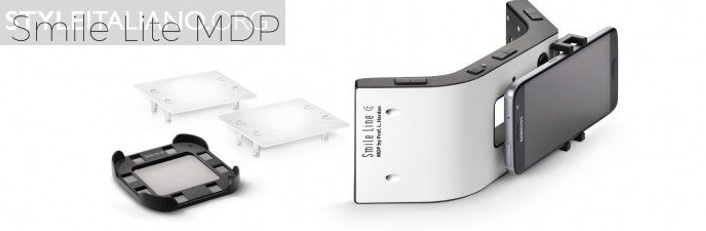
The parameters to set in this case would be the flash power (4 different steps of power) and camera zoom. This set-up allows you to have consistent pictures in a much easier way. It gives you the option to take pictures using a polarizing filter which is ideal in colour comparison. Even though it is not scientific, the preprocessing and the post-processing of the images in the phone sensor are amazingly precise, giving outstanding exposure and white balance.
We strongly recommend this tool to three groups:
- To people who lack knowledge in photography and are not interested in learning,
- To those who rely on the assistant or hygienist to document the photography
- Those who are unwilling to spend or cannot afford an expensive DSRL camera and lenses
Fig 15: Pictures taken with Smile Lite MDP. Flash power: 2 without Polarizing filter

We recommend the following type of photography to document bleaching:
- Polarized: this is ideal because it eliminates all the reflexes and enables us to appreciate colour
- Twin Flash 45 0 45: this gives a good picture because it creates reflection only in transitional angles
- Ring flash: not ideal because it gives a lot of glare on the buccal surface
- Diffusors: again not ideal because reflections are too white and ‘kill’ the colour
- Studio portrait: the least ideal to appreciate colour differences.
Fig 16: Accessories for documentation:
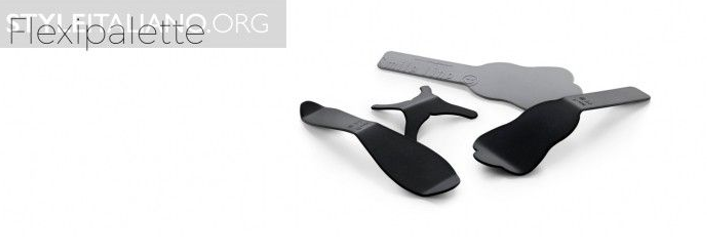
To document bleaching we need good cheek retractors, the chosen shade guide, black photography contrastor, grey contrastor, a good light temperature and a camera.
We use Flexipalettes as black contrastors for intra oral photography and grey Flexipalette for colour match.
Fig 17: Smile Lite allows us to choose the right colour shade guide thanks to the ideal lighting conditions (5500K).
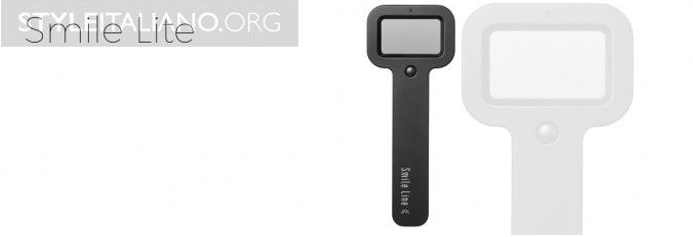
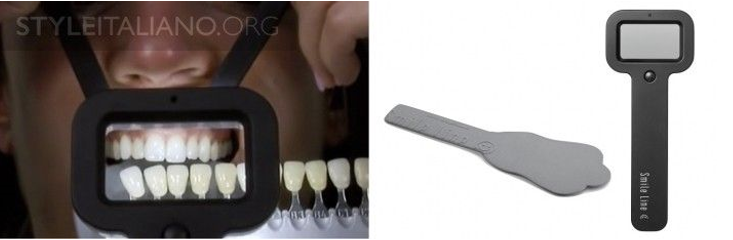
Fig 18: To choose the right colour tab we usually use Smile Lite with grey Flexipalette for shade matching in the best conditions. 5500K light is the ideal colour temperature with neutral grey.
Taking and documenting colour is strongly recommended specially to facilitate better communication with the patient. In this article I have tried to summarise the tips that I have learnt through experience, these tips have helped me to be consistent and efficient when taking and documenting bleaching cases.
Remember to take the shade before teeth dehydration, (also important to remember in conservative and prosthetic dentistry). I strongly suggest using a shade guide specially designed for bleaching because it has more tabs (bleaching tabs) which do not exist in “normal” shade guides. In addition, it is classified by value, the colour dimension that changes with bleaching (VITA Bleachguide 3D-MASTER) rather than by hue, as is the case with other shade guides. We prefer to bleach the upper arch first with “at home” bleaching because in this way the patient sees an immediate difference and is highly motivated.
If you need a simple protocol to document bleaching, use the Smile Lite MDP with your mobile phone in order to have few parameters to take into account before shooting. If you like photography and already use a DSRL camera you should be consistent with camera and flash settings in order that before and after pictures can be used for a visual comparison.