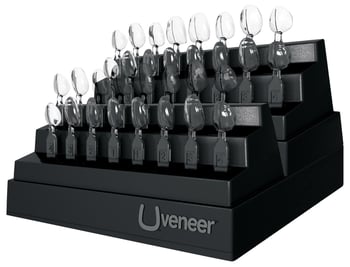
Dr Comisi shares his experience of Uveneer; Ultradent’s direct composite template system, available from Optident.
I have been working with a remarkable product in my practice for over a year. This kit allows me to consistently create beautiful direct composite veneers and restore fractured teeth in significantly less time than conventional methods. This system is called Uveneer.
The inventor, Dr Sigal Jacobson, developed these templates from her own need and to help other dentists to create predictable direct composite restorations with an easy, fast, and predictable one-visit technique.
What is Uveneer?
 The Uveneer kit is an assortment of 32 templates.It consists of:
- 8 x Medium upper arch templates
- 8 x Medium lower arch templates
- 8 x Large upper arch templates
- 8 x Large lower arch templates
The reusable templates can be used for a single tooth or multiple teeth for final restorations or for use in the creation of chair-side mock-ups.
They are designed to be used with any composite and bonding agent that the dentist chooses. This, combined with the re-use capability (autoclavable kit) of this template system, ensures a very high return on investment.
Uveneer in Use
A 17-year-old patient and her mother presented to treat deep mottling of teeth Nos. 11 and 21. The patient and her mother wanted aesthetic improvement to these teeth.(Figure 1)
We suggested first trying to micro-abrade and then infuse an unfilled resin system (Icon) into the areas to attempt to improve the appearance of the mottled areas. The results were an improvement; but the patient and her mother were not satisfied from the results. (Figure 2)
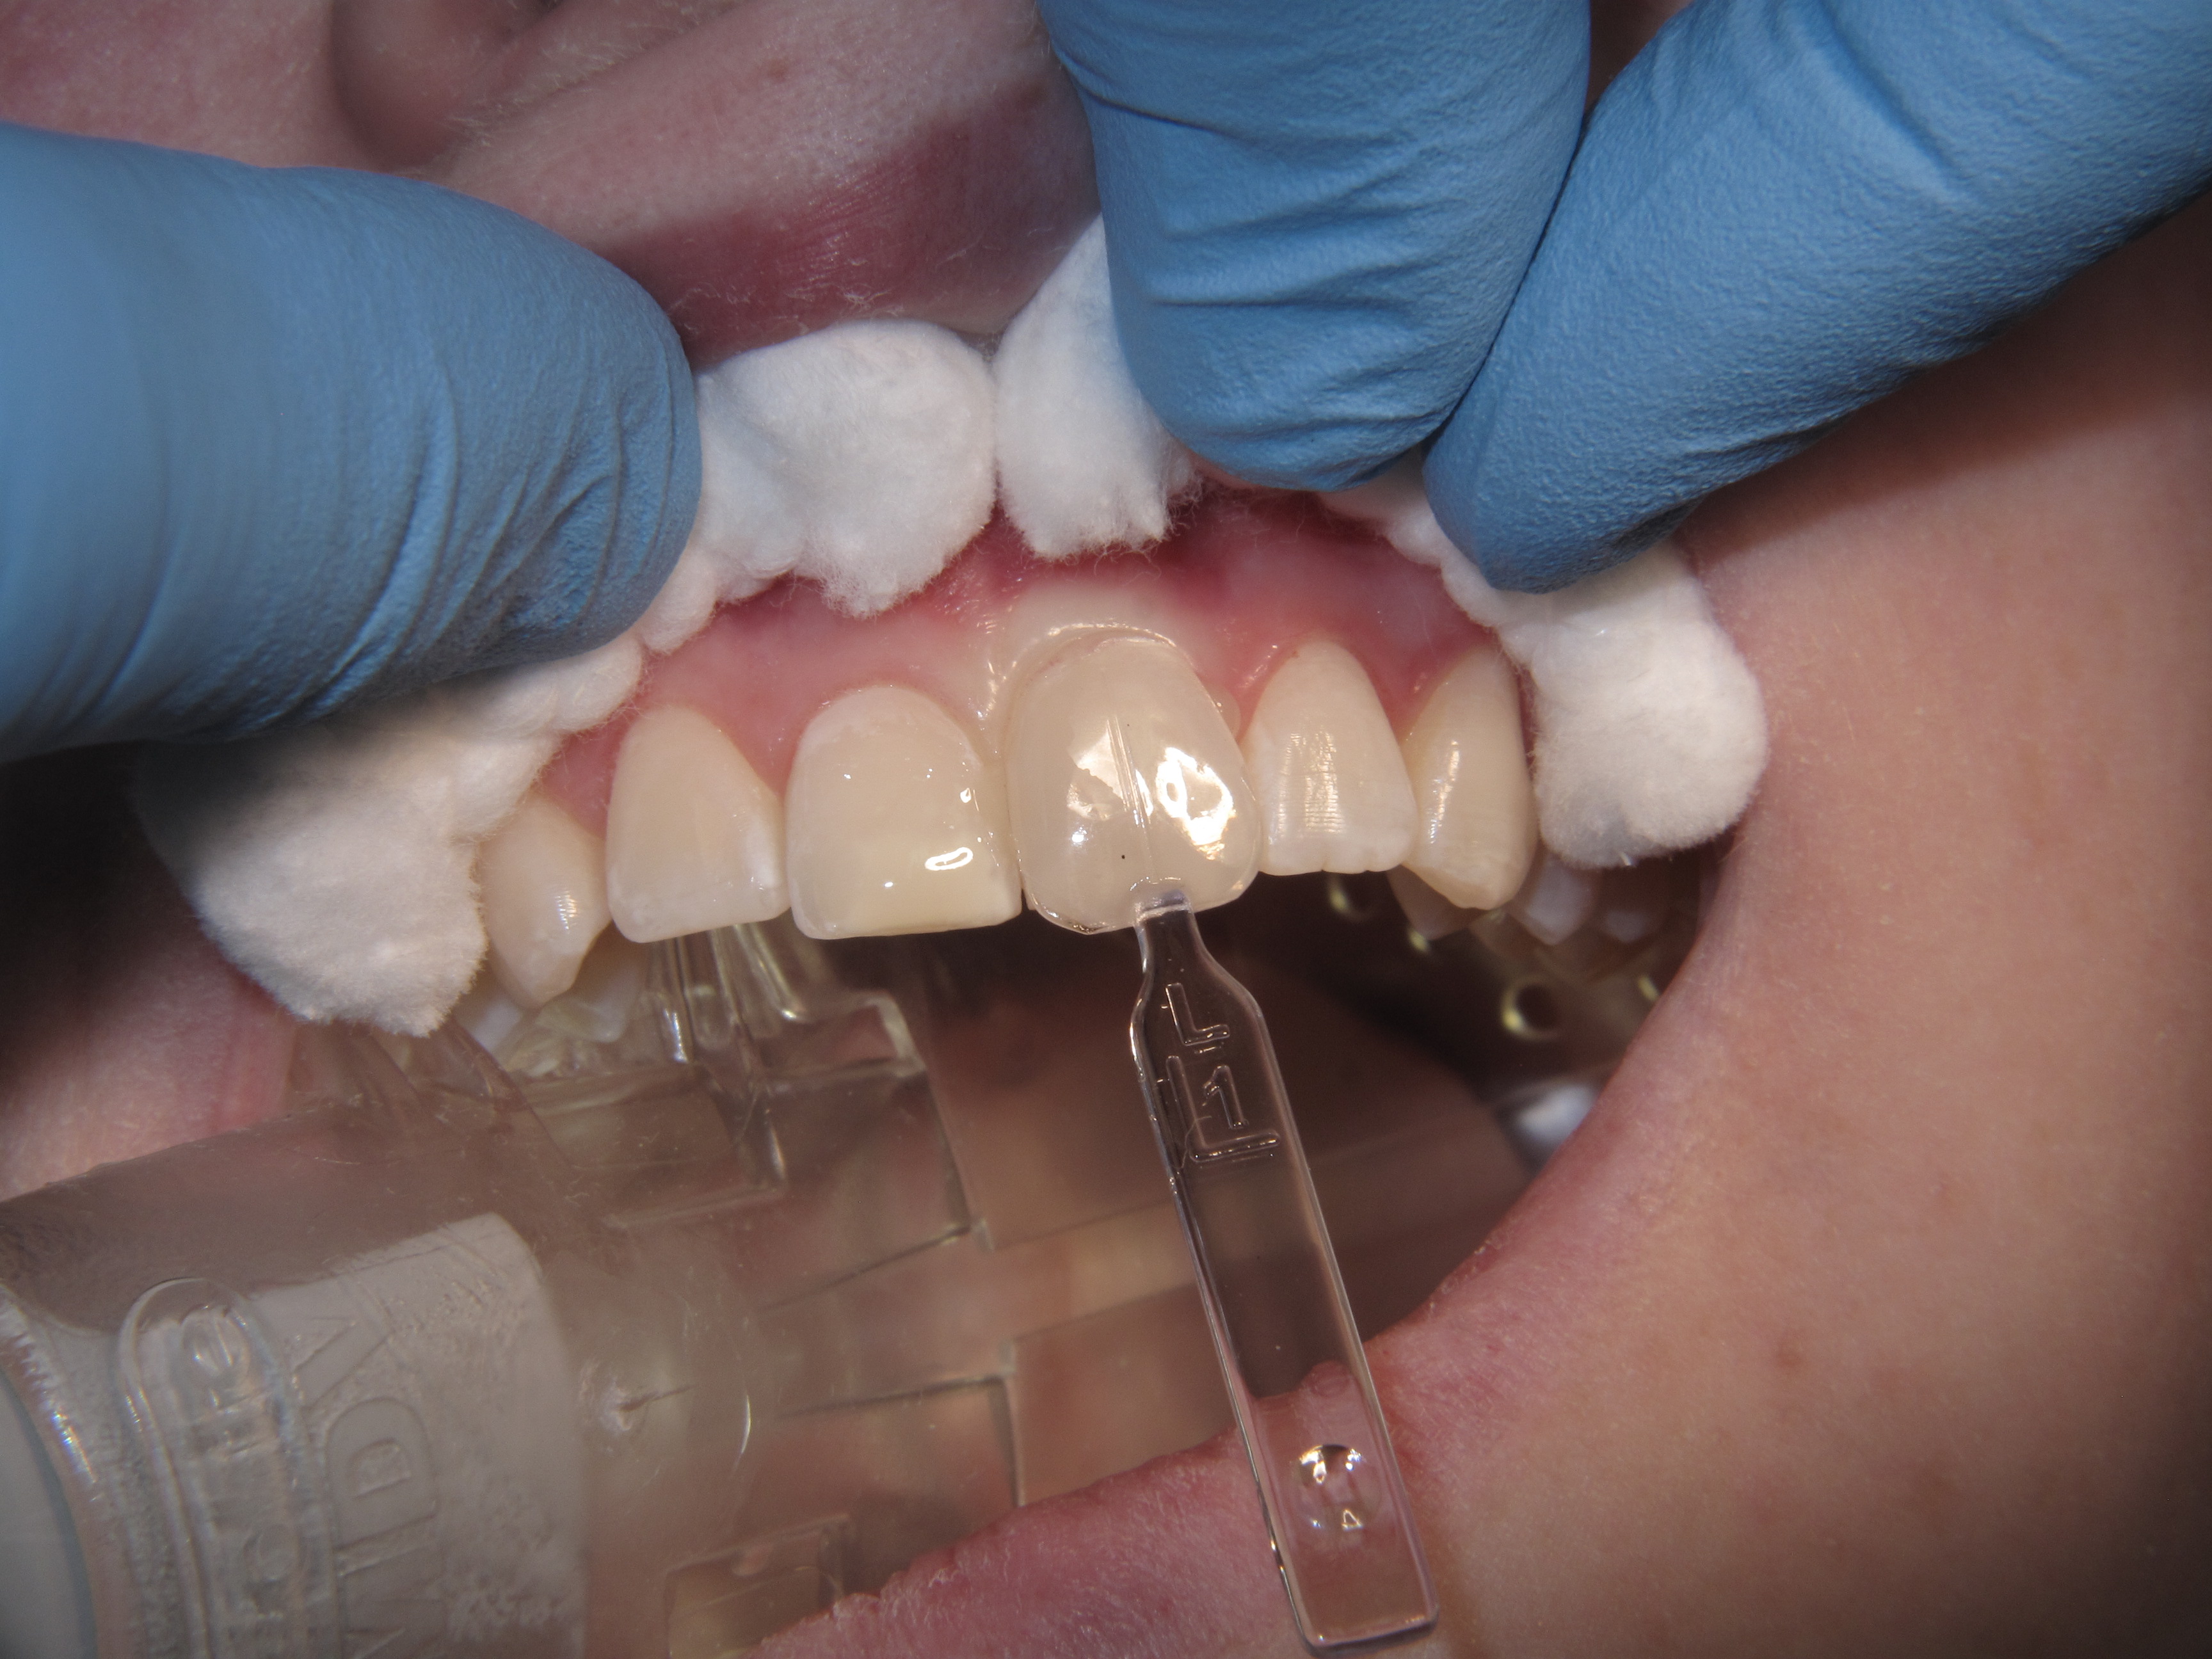
We then discussed placing cosmetic direct veneers in a minimally invasive procedure using Uveneer. The parent and patient agreed to the procedure. We first identified the correct size we wanted to use, selecting between medium and large; by laying the template on the tooth and assessing the size. Appropriate shade of composite was selected and teeth were isolated. The best way is to work one tooth at a time. (Figure 3).
The facial surface of the tooth was roughened with a medium grit diamond to increase retention, etched for 20 seconds and bonded with universal bond (BISCO) as per instructions. Beautiful II (Shofu) composite was placed on the tooth surface and at the same time, a small amount of Beautiful Flow Plus (Shofu) was added into the Uveneer template. (Figure 4)
By utilising the glossy and translucent characteristics of the flow and blocking the oxygen inhibition layer we achieved perfect final glossy results. The template was then pressed onto the tooth with the uncured composite on it and aligned with the long axis of the tooth. (Figure 5)
Excess material expressed from the margins with a probe, and then all was cured for 30 seconds through the clear Uveneer. The Uveneer template was easily popped off creating the perfect anatomically correct and glossy result. The next central incisor procedure was performed the same way. The final result is shown here. (Figure 6)
Having these tools in my dental “bag of tricks” makes my day-to-day practice easier and faster and attracts new patients that ask to get those beautiful results.
For more information, to buy, or to arrange a practice visit, call 01943 605 050, email sales@optident.co.uk or visit www.optident.co.uk


